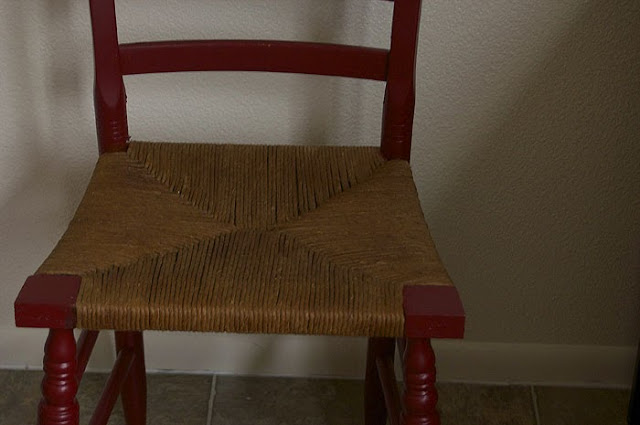
The red chair
Thursday, July 25, 2013
We acquired a set of four red, caned chairs when we moved to NC. They belonged to Max's Grandma, and are a lovely set of chairs. However, last year, we started to notice that the seats were getting very worn down, and some of the caning was starting to break apart. The red paint was also fading quite nicely.
We started to look at our options for updating the chairs. After doing research, we found that it would be more than we could afford to have all the chairs re-caned professionally, so we looked at some other options, such as putting a new fabric-covered seat into the chairs (easy to switch out and inexpensive). In the end, Max really wanted to re-cane the chairs, and he convinced me it would be a fun, easy, and low-cost project to do ourselves. Oh how I laugh at that now!
To be fair, it wasn't THAT hard - it just took us a lot of motivation and time to get them done. And it was much cheaper to do the entire project ourselves. We paid for the paper rush (about $40 for all that we needed), and a new can of red paint. We found the paper rush (the material used to cane the chairs) online and ordered it. Then, Max researched (aka watched YouTube videos and googled how to: cane chairs) and came up with a game plan for caning the chairs.
One of the chairs before we took the old caning out - the seat was breaking, and the paint needed a new coat. We pulled the old caning material out, and set about re-caning the seats.
Silly us, thinking we could get all four chairs done in an evening or two! Ha! It took us a few weeks, working a few hours here and there (I watched a lot of Friday Night Lights while working on them!!!) to get the seats completed. You can see the chair skeletons in the photo above. We were just getting started on the caning. That was probably the hardest part. Once we figured out the process and understood the method, it was smooth sailing - and we just needed to put the time in. Really, it wasn't that hard doing it ourselves and I think that if we had to do it again, it would go much quicker because we figured out how to do efficiently (not necessarily professionally, mind you, but I think they turned out pretty darn good!) and effectively.
One of the chairs, halfway done. Weaving the paper rush was definitely challenging at times! Once we got all four chair seats re-woven, we put a couple coats of shellac on the paper rush, to harden it up. At that point, it was time for our move to CA, so the chairs took a trip on the moving truck. Once we got here, we painted the chairs with a fresh coat of red, and this is the finished product:
So proud of those caned seats that we did ourselves! It was a lot of work (I definitely don't think we realized what we were getting ourselves into!), but totally worth it! I have such a sense of pride over getting the chairs finished, and using them in our house. They look great with their new seats and a lovely new coat of bright red paint!


6 comments
Wow it looks amazing!!! :)
ReplyDeleteI'm not sure I would have the patience to redo them but you guys did a great job! They look awesome!
ReplyDeleteThese turned out fabulous! Great job sticking with it!
ReplyDeleteWow! Those looks awesome!
ReplyDeleteThose look amazing, and I'm definitely impressed you did those yourself. I don't know that I have the time or patience to do something like that!
ReplyDeleteI love that you guys did something like that! I wish I was that adventurous. They look awesome!
ReplyDelete