The Couch
Tuesday, September 12, 2017
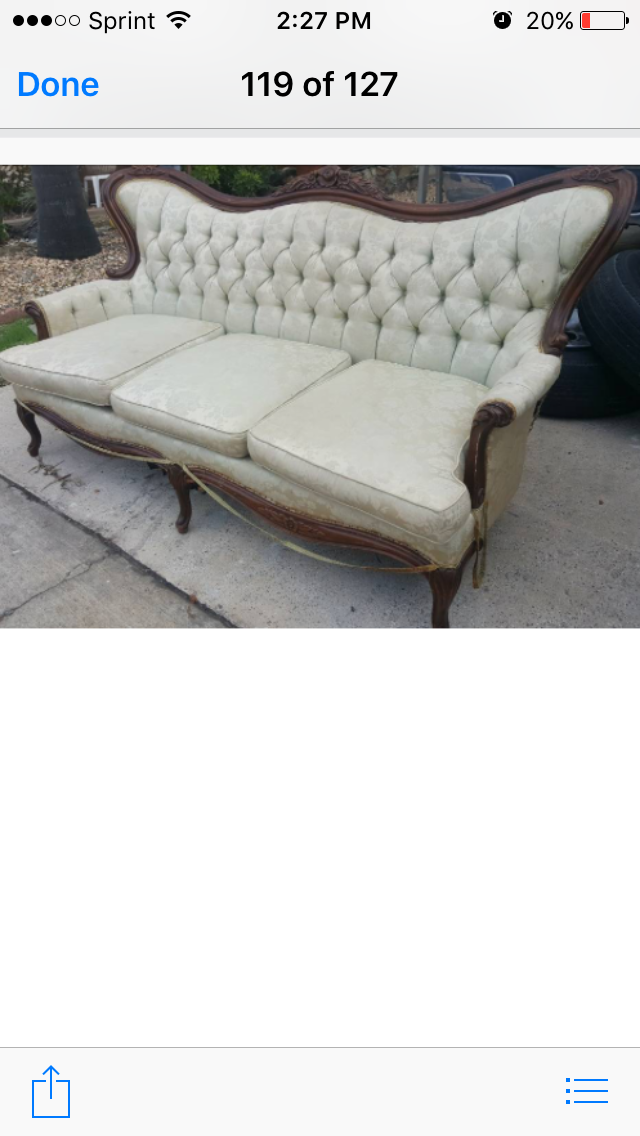
It all started with a craigslist ad for a free couch on the curb. Max and I were headed home from dropping the kids off at my parents for a few days, back in December of last year. We had an empty van, and I had always wanted a cool "old" couch, so it became craigslist adventure time. The couch had decent bones, but the outside was not so happy - the trim was falling off, there were cat scratches in the fabric, and it smelled - which meant that I would have to replace everything, if I wanted to keep it! Max assured me that it couldn't be that hard (his famous last words, everytime!), and I somehow agreed with him, and so we managed to squeeze the thing into our van, and brought it home.
I started doing a lot of research, and came across some good blog posts by other people who have restored/reupholstered old couches - specifically victorian settees or couches. They were super helpful for me to read - to get an idea of what tools/supplies I would need, the steps I would have to take, and a realistic budget. I knew that I would need foam, stuffing, fabric, trim, a few tools - but that it wasn't cheap to replace all of it. We had known when we picked it up off the curb, that it would be anything but "free"! I set my budget, started searching for the fabric I wanted to use, and began collecting my tools.


I started taking her apart, piece by piece, tack by tack. It was a long, arduous process - the fabric was held in place by thousands of little tacks, and some were old and rusted into the wood. "Undoing" the couch was by far the most time-consuming part of the entire project. I think I put at least 30 hours over the course of a few months, into pulling those tacks out! As I went along, I made sure to take pictures of how I was taking it apart, and I labeled each fabric piece, so I could use it as a template for the new fabric pieces I would cut out!

I started taking the couch apart in January, but lost some motivation over the next few months, and so it sat in the garage for awhile. Once Max deployed, I knew I wanted to make it my goal to finish the couch while he was gone, so I started putting more hours into getting it taken apart in the Spring and early Summer. I would spend an hour during nap time or after the kids were in bed, every few days, turning on a podcast or music to listen to, and working my way around, pulling tacks out and taking notes. It wasn't until the end of August that I finally had the entire thing taken apart - tacks out, fabric off, stuffing out, horsehair thrown away! I found it pretty neat that it had a tag on it, from an upholstery shop in Maxton, North Carolina, with the date of 1971! I don't know if that was when the couch was originally made, or if that was just the last time it was reupholstered!

Once I had it taken apart as far as I wanted to go (I kept the innermost burlap layer, the edge rolls, and the springs, as they were all in good shape still!), I made sure to check the springs for tightness, and then I began working on putting all new pieces back on the couch! I used the pictures I had taken, and tried to just work "backwards" from how I had taken it apart, putting new batting, lining, burlap, muslin, fabric on as I went! If I ran into questions, I would go back to the blog posts/tutorials I found, to see how others had done their couch restoration/reupholstery projects!


When I originally started this project, I intended to re-do the diamond tufting that the original piece had, but I ran into some issues (thanks Mom, for sticking out those tense moments of helping me with that!!) and in the end, decided to have it be a flat fabric back. I didn't map out the tufting from the old couch well enough, and they had also used a lot of extra batting to stuff the tufting, which I didn't anticipate. As I attempted to tuft, it just wasn't coming out the way I hoped/expected, and after deliberating and searching different couches, I went with the flat fabric panel on the back of the seat. I'm really happy with how it turned out! I think it makes it more "French Colonial" than "Victorian", but I'm not a style expert ;)
I also decided to get some help on the seat cushion. I probably could have figured out the sewing, but I wanted to make one cushion in place of the three original cushions that were there, and I knew that it needed to be done well, so it would fit and look right! I found a local upholsterer that was happy to help - he was so helpful with other aspects of my couch as well, and did a fantastic job on the cushion!

I have to say, there were moments, as I was pulling out tacks and spending hours on one section of the piece, back in January or July, that I wondered if it would be worth it. If the couch I came out with would be "cool" enough to have gone through all the work for. I can definitely see now why upholsterer's are paid what they are paid - It is very time-consuming to take an old piece apart, and to restore it. I wouldn't say it is "hard" to do, necessarily, but it was tedious and took a lot of work/time. I almost stuck to the budget I set out with (do you know how expensive good upholstery fabric and foam is?!?!), but with getting help with the seat cushion, went over by a little bit. I'm still really pleased, as I know that if I had found someone to do the entire project, it would have easily been two to three times the amount I spent on it!
I learned a lot about restoring and reupholstering old furniture through this process. The couch isn't perfect, but it is imperfectly unique - and all mine. I'm very happy with how it came out, and quite proud to have gotten it done! I think it fits in quite well here, and I am thoroughly enjoying the time I've been able to spend reading and sitting on it, now that it's complete!


1 comments
I am so in love with how it turned out!!!! Awesome job!
ReplyDelete